Pages

Showing posts with label terrain. Show all posts

Thursday, 13 January 2022

Out on the banks of a river...

 Over on DakkaDakka there's a regular terrain challenge that I've started to take part in thanks to the modular boards. While most people take the themes and try to create one piece of terrain like a building, I've been trying to take the theme and convert it into a new set of tiles to add. The last one ended up in the swamps, even though it started as a book/reading spot related thing. If you go back to the first tile for the swamps a few posts ago you can see the books all piled up by someone.

This time the theme is Crossings, so I've chosen the obvious of a river crossing or two. This necessitates the creation of an entire river for the table too as I don't have one of those yet! The first trial was just a flat tile with the river painted onto it... but it just felt like a real copout in terms of opportunities, so I manufactured a new tile type with two raised sides, allowing for the creation of some banked river tiles


Above, you can see one half of the low tide gravelly path across the river. It looks/feels a little bit too high though. I should probably have just painted it underneath the river instead of trying to gravel the whole thing... ah well! There will be a few more layers of different blues over this, followed by some modpodge for a bit of texture and shine.

The finished version along with the bridge and about another 12 river tiles (possibly more, I forget...) will be shown later as they are also going into the Analogue Hobbies challenge

Wednesday, 15 December 2021

Slacker reporting for duty!

Well *that* didn't go as planned! I blink and it is suddenly December 2021... 18 months since the last post here. I blame lockdown as it only seems like yesterday since I last posted! It seems I not only missed posting last year's AHPC stuff... but all of the work done on the modular gaming table, an Age of Sigmar Flesh Eater Court *and* a vampire counts army! I have some catchup posts to do I think!

At present I'm prepping for this year's AHPC, so there's a bit of backlog clearance to do before that starts... as well as prepping anything I want to actually paint!

So what is the main change over the last 18 months? Well things have moved on quite a bit since then. I invested in an Ender 3 to go with the resin printer, which means I have the capacity to print larger, or lower quality, things... leaving the resin printer to deal with figures rather than terrain. Remember those foam hexes that I was making last time? They are no more*, they have been replaced by a combination of printed hex plates and some risers. These were based on a concept another company did with Openlock connectors, but each hex used significantly more filament and took quite a few hours to print. With these very basic ones I can print 4 risers in the time it would take to print 1 of the others. These are also scaled to match the foam hexes that I already have.


This makes storage a lot easier, as well as simplifying swapping hexes around as I can leave the risers in place and just swap around the top bits. This has meant that I've disassembled some of the foam from 2020 and rebased them, though there's still all the trees to work on. There's a little bit of tidying up that I need to do, then they will be going onto Thingiverse. It's not full terrain like Hexhogs' mountains/cliffs (more of which later), but encourages terrain building instead. For grasslands I've been using Vallejo textured earth paste

Larger buildings or set pieces are going on merged tiles, allowing a bit more scale to be added


Likewise, it's easy to create new details to completely change the scope of a layout. In this case a set of railway line tiled means a fantasy village becomes a pulp countryside setting instead. For the railway I also printed a resized crater from Hexhogs and added some railway lines to allow for some demolition scenarios to be done with a simple swap when the bomb goes *BOOM!*


Dakka Dakka had a terrain challenge, with the theme of books so I made a little swampy reading spot using some bits and pieces of plastic terrain and coffee stirers. The stairs were from the angelic character from the recent AoS box, with some Crooked Dice birds adding to the tree


Then I realised that the competition had another month left on it... so I may have gotten carried away and made loads of swamp, grasslands and road tiles to make a 2x2 gaming table. Adding in some other bits and pieces that already existed, this is now a 3x3 swamp table for an upcoming Fantasy 7TV day in February. I'm looking forward to playing some games over this one!


The one thing I need to work on is making the grass look better. Currently it is just coming out as *green* with some fairly bland brown bits for mud... I forsee some experiments over Christmas to try and improve these, especially as I have another 3x3 layout to make before Feb as well!


*so if anyone wants a giant box of foam hexes, the cutting templates and a lot of the tiles from the original layout, let me know!

Friday, 12 June 2020

Table updates

No new 3d work recently, I've not really been in the mood after the roof for the pigsty failed to fit properly. I need to go back and fix both parts at some point, but I've sorta lost interest in that one.

Aaaanyway. I have done some more bits and pieces to go around the table though To get a bit more shape to the table, I cut a bunch more hill sections. I'm slowly getting to grips with cutting these things and only worrying about the edges cut to the right level neatly and hacking the rest in to allow for some variation in shape/curvature once the polyfilla goes on
 

The woodlands got some nice extensions too. These are the last two Citadel wood trees that I own now built, so I had to go searching for some alternatives. The joy of a 3d printer is there are a few decent alternatives out there. The ones I settled on were the Winterdale Gnarly trees from Printablescenery.com. They look pretty good, but not quite up to the same standard as the old GW plastics. Still, $9 for the file and about £1.20 per tree in resin and more variation is pretty good value for a bit of a quality drop. The added bonus is I've also printed out a bunch at 10mm for a different (new) project that will get it's own post at some point
 

The bushes are from the free sample pack on the Lost Adventures kickstarter page and the free Black Carrot Designs tree stump on Thingiverse. The fun of 3d printing is the ability to merge models to provide some variety, which you can see from the bushes merged into the treestump. I also added a little rabbit hiding in the bush, to see if anyone is paying attention while playing on the table ;)
 

There are also some squirrels and a magpie hidden in the trees if you look carefully. The last addition doesn't really fit the more fantasy theme, but will be a fun objective in more weird war/pulp games. I had the shelter for a while all painted up, but kept forgetting it existed... so it is now part of the table.
 

Thursday, 21 May 2020

The joys of printing

I mentioned the other day that I bought a 3d printer, well lockdown finally gave me that kick to use it properly and start learning how to use Blender to make my own models as everything I could find didn't quite fit the aesthetics I wanted. A few years back when I was on a resin casting kick, I tried sculpting/casting an extra wall to go with the GW Garden of Morr set as I loved the style... but hated all the skulls on it all. That didn't go so well as the plaster started to disinegrate in the wet rubber.

Roll forward a few years and I've not only managed to create some straight walls that fit nicely, but I've managed to create a full set of walls for the table and I'm over the moon with how well they have come out.  The set also includes a small gateway, like the Secret Garden and a collapsed section... but also includes a lychgate. It is for a cemetary after all.

Given that these are my first ever 3d models, I was a little wary of doing anything with them, but I was finally convinced the other day to let others have them as well. It's not like I've got enough of a following to try and sell them yet... so they are now available for free on https://www.myminifactory.com/users/MrMagpieCreates.

Future models will also be added there too. Enjoy! and if you print them, please let me know, I'd love to see them in use!

Friday, 20 April 2018

Gaming tables

During the painting challenge I started to finally build my gaming table using a hex tool that I bought off kickstarter from a company called HexTerrain. These mdf tools make it easy to create a modular table, which for me is a godsend as I'm fickle and get really bored of the same layout all the time.


While it looks great, it was taking forever to cut out all the hexes for this little section, which isn't even 1/8th of my gaming table surface... plus I've not even started on hills, rivers, cliffs and the riser blocks needed to make the different levels of the table. One of the main challenges for this is getting the two layers of the template lined up correctly. As you can see from the current tiles, there are some gaps and misalignments that have come about due to the two sides being a little bit twisted.

In a mad flash of inspiration and a call to foam cutting service, I now have a *huge* box of machine cut hexes :D


Thursday, 2 November 2017

And now for something completely different

In a change to the current schedule, for the first time in what feels like ages... I had a coupe of days off work this week and took the opportunity to make a start on some new terrain. Now I have a table, I needed some buildings to go on it! This is the second 4Ground building that I've put together. This one is much much better than the bombed ww2 building. The detailing and fits seem much better.


The forge and chimney consists of about 35 pieces alone! The building is going to be set into some hex shaped bases so that it will slot nicely into my table when it starts going together. While the kit is very pretty, it feels too clean and needs some of the roof tidying up, so I've started hacking this thing up already. The sharp corners to the brickwork on the forge are being roughed up  a bit to make it look less neat. I need to find some time at the weekend to practice with the foam cutter to make the tiles. Once I have the base, the painting can start on the forge...

Some of the Oathsworn dwarves turned up today as well. These are quite a nice kit with plenty of options to make up various troop types from Frostgrave as well. Not quite as many little optional bits as the others, but this is intended to be ranks of infantry rather than skirmish based. The parts will scale well though, so making them more personalised will be easy enough with leftover bits. I grabbed a coupe of the metal figures too, which are excellent as a Heritor, Mage or Crow master. Looking forward to fiddling with these kits.

Tuesday, 2 February 2016

Defensive Terrain

Defensive terrain was a very subjective and ever so vague title for a bonus round and caused some pondering. Inspired by the Epic Fail entry, I decided to keep this one fairly simple and add to the Old West project at the same time.

The cowboy is from Great Escape Games as part of their Dead Man's Hand range with a few pieces of terrain from various places.

From this angle it looks like a fairly big base for him, or a small diorama. Turn it around a bit and it starts to make more sense...


He pops off the base to be useful elsewhere, or allows someone else to take his place behind the barricade. I forgot to paint it up, but there is a second stack of grain bags on a base that fits into the gap so it can be used as pure terrain.

Monday, 30 November 2015

Dungeon Saga furniture

With the painting challenge fast approaching, lots of time is being spent prepping models, sorting spreadsheets with active projects and laying down a Dungeon Saga challenge to anyone who wants to partake, the only limitation is that you must already be in the painting challenge.

The Dungeon Saga challenge is to paint up all of the heroes and monsters in the Dungeon Saga core set. The winner is the first person to complete the models in the below image. The prize is bragging rights and one model from each of the other participants (the losers choose what fantasy model they send the winner). If you want to join in, just add your name to the thread on the Challenge blog.

Anyway... as I'm aiming to get the DS models all painted up over the next few months, I decided I should probably sort out the furniture while I'm waiting. There are still all the barrels, chests, doors and some of the stonework pieces left to do, but it's a good start to the set


While I was taking these photos, I also took some nicer ones of the various pieces of scatter terrain and added them to the terrain project page.

Monday, 23 November 2015

Scatter terrain

It has been quite a while since I've posted any new painting  and with the upcoming Analogue Challenge, I thought it was about time to get the brushes back out again and put paint to plastic (or MDF in some cases) to I wasn't quite so rusty. The first two are some bits of scatter terrain for use in a muddy English village, or a railroad town in the Old West. The well is one of the pieces of terrain provided with Dungeon Saga. Thanks to the Kickstarter bonuses, I have three of these; which I think is highly unlikely to occur in any adventures... 
The other piece of scatter terrain was this little chicken coop from Warbases. Again, destined for an English village circa 1943, or an Old West town.  One thing I have realised is that quick snaps with my iphone are not going to cut it for the painting challenge as the colours in these are well off. I'll take some better pictures when I clear off the dining table and set up the lightbox.

Sunday, 25 October 2015

An actual painting update

For the first time in a while I managed to get the painting table out. You know full well this is because I'm supposed to be revising for an exam though, so finishing off a couple of bits is more distraction than help... but hey. At least a couple of bits of terrain are now done.

Unfortunately, with the lightbox packed away at the moment, the photos are a bit washed out so you can't see some of the colourings. I'll have to come back and revisit these at some point

The TARDIS is a nice little model, but this afternoon I was a little shaky, so I didn't fancy attempting the white writing. I'll have to return to that at some point in the future.  This will work nicely as a random piece of terrain in historicals (for fun), time travelling transportation in pulp games and as an actual phone box in pulp games too. Versatile or what?

The other piece of terrain came from 36 Chambers on Ebay. and is a great little piece of cover for my ww2/pulp village. I've been thinking of making one for a while, but for £6 it seemed too good an offer.


Thursday, 12 March 2015

RIP Sir Terry (oh, and some ebay Trees)


Today saw the very sad news that Sir Terry as left us and gone to have tea with Binky. It's not often that something gets me choked up (normally it's something stupid, not someone famous passing on). When we had the Great Clearout before moving, the Pratchett collection was the one book collection that remained intact as it is dear to both of us. Time to go back and start re-reading the Diskworld books from the very beginning.


On a brighter note... the next parcel arrived for the Great Terrain Project this morning, all the way from China. I wasn't expecting this little bundle of joy for at least another few weeks as the estimated delivery was early next month.

Thanks to the wonders of ebay and international commerce, I got a pile of neon trees. I wasn't aiming for neon trees, but that is what I got none the less


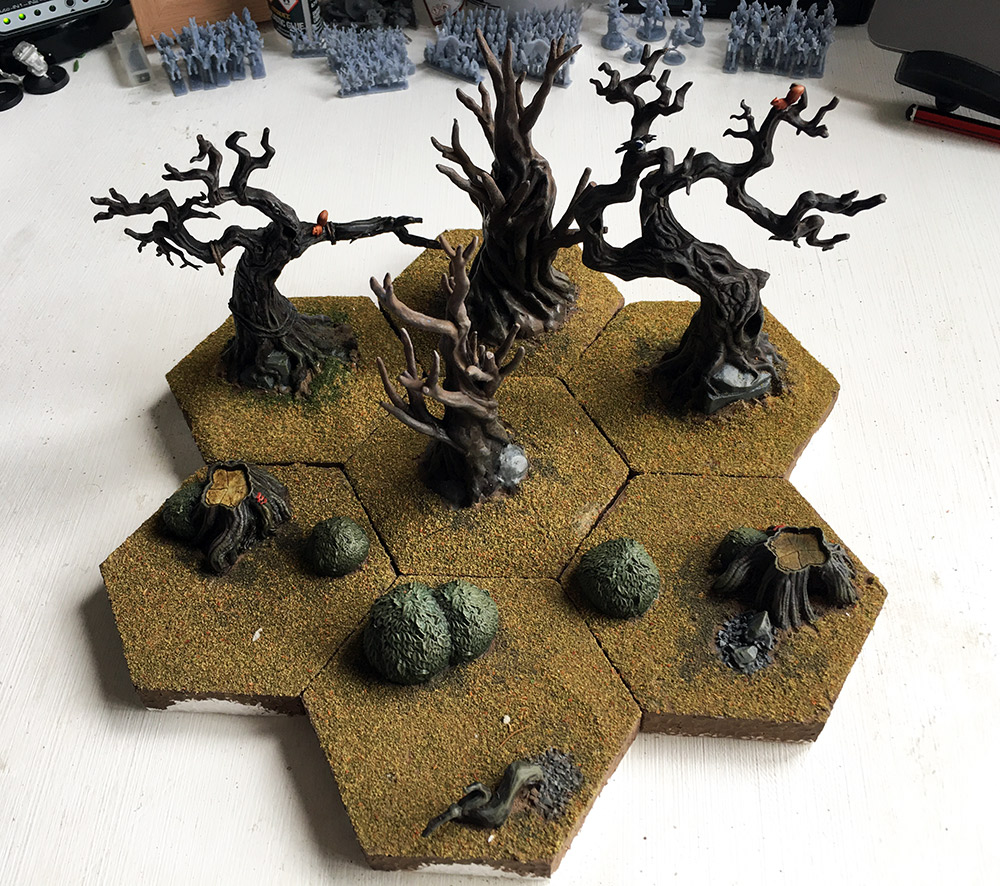
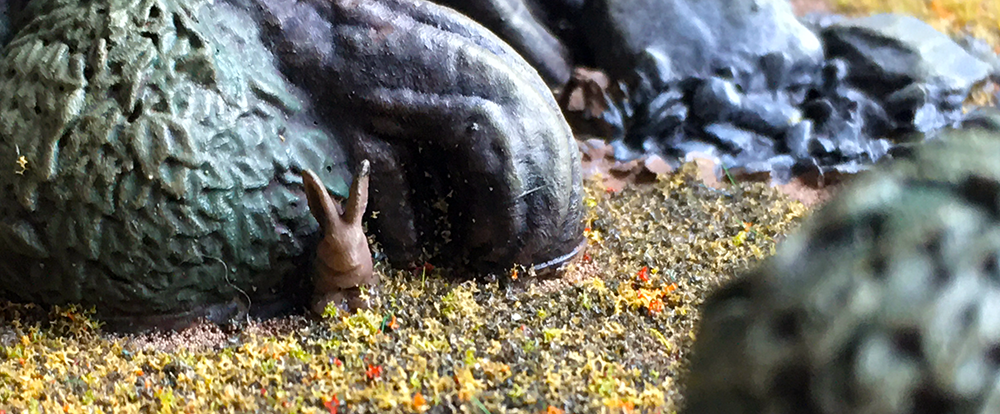
In this photo you can see the 5 different tree types all lined up with a Warlord commando for scale. Starting form the left we have a fine example of the flower covered ball trees. These are wire based and very densely packed, so they look like nicely maintained miniature trees, perfect for putting in half barrels around the village. You can see a red one at the other end of the ruins. You get 30 of these for the exorbitant price of £2.80.

Next up is a very special apple tree, with fruit. They are a little bit big for 28mm your normal sized eating apples, but are perfect for cooking apples or those really large apples you get in Germany. The ones the size of your head. For £1.44 it is the most expensive tree in the parcel, but easily the nicest. Again, it is a wire trunk so the branches are pose-able and the leaves are pretty dense, so it doesn't look half empty like the larger trees. At some point I may get some more of these ones to make an orchard.

The third tree is from a pack of 5 Mulberry trees. I wasn't expecting too much form these ones as they worked out to be about 50p a tree. The stems are shiny plastic with no wiring, so with the plastic bent, the trees are most likely to be staying that way, unless I can heat them up, or wire the trunk myself. The leaves look like moss or shredded sponge and are rather neon compared to the others, so I need to work out how to tone the greens down a bit. I may try some green washes on them when I try to paint the trunks so they look less... plastic.  Not perfect trees, but certainly good for quickly building a forest cheaply.

The final tree type is the largest, generic tall tree. At 32p each, these are even cheaper than the Mulberry ones, but look slightly less OHMYGODGREEEEEEEN. They are all bent like that though, so again, I need to try to straighten them and make the trunks look less plastic. I think these ones will probably have the trunks cut short so they aren't quite so bent. This should hopefully make them fit in more easily and removes the problem of the oh so plastic trunks.

The two cheap tree types are dropping bits of greenery all over the place, so definitely need some fixatives applying soon before autumn hits home. I think some of the mulberry trees might look a bit better if I fill in some gaps with bits of darker Scenics tree stuff. I've got plenty of them to try experimenting with, so we shall see.


It was an interesting experiment and none of them are beyond saving, so all in all a good little parcel that should provide lots of greenery for the board. Now I just need to get some basing for them so they actually stand up...


Tuesday, 10 March 2015

Slightly distracted...

Dammit. I knew there was something to do over the weekend... I spent last week frantically finishing off the final sub-challenge model and took the photos on friday to submit. Typically, I wasn't happy with the figure and thought I'd do some extra work on saturday. Well, that never happened and I forgot to submit the photos I did have. Doh! Still, I'll try and get him done for Thursday assuming I don't get sidetracked with the next project.

With just over a week or so left on the challenge, bits have started to turn up for the post-challenge project... a really nice Mat-O-War cloth. As you can see from the photo it is a little bit stiff and very wrinkled, so something needs to be done about that. The reviews I'd read of these cloths said that it is a good idea to wash them a few times to soften things up a bit so they drape nicely. It hasn't come out too well in the photos, but the cloth is made of compressed flock and a resin-like material to form a dense, long lasting tabletop covering.  Rather than run the risk of damaging the full cloth with some experiments, http://www.antenocitisworkshop.com helpfully sell small samples of the cloth. I picked up a couple of samples, one lot to put through the wash a few times and another to see how it takes weathering powders and paint to add a bit more variation.

 I thought I'd see what the cloth looks like with my current, painted terrain collection. The three sets of ruins (2 form 4Ground, 1 set of Warlord farmhouse ruins) are causing me some issues. I'm unsure what to do with these as there needs to be a lot more rubble for all three buildings, especially the right most of the three below. If the house was so bombed that it is missing the roof and at least one floor, I'm at a loss to explain why there would be visible flooring inside. I will probably have to fill this one with large amounts of rubble so it is difficult terrain for infantry/impassable to vehicles. There are lots more tank traps and crates being undercoated at the moment, all from Dust Tactics.


And a couple of action shots

Saturday, 28 February 2015

Statue

One of the things I want to do after the Challenge is finished is to start making a terrain board so I actually have something to play on as well as providing a nice backdrop for photos. Ages ago I bought this model to paint up as a statue. I still need to make a plinth that it can stand on.

One thing I really want to add is a pigeon, but I can't find any 28mm ones. I've seen ducks, geese, swans and pheasants... but no pigeons. Maybe this is a use for the sculpting workshop? 


Thursday, 7 August 2014

Dungeons, no Dragons

 Earlier today Mantic released the Alpha rule set and three scenarios for their Dungeon Saga kickstarter. The campaign is slowly ticking over and slowly gaining backers and expanding in value.

To go with the alpha rules, Beasts of War have done a play through to demonstrate how things play and so far it's looking quite good, though so far it's not quite a replacement for Warhammer Quest as it needs a GM to play and there's no random dungeon mechanic. Both of these may be solved later in the campaign, but both are probably quite easy for the community to add in later if needs be.

Listening to the videos and game demo have sparked lots of ideas for my dungeon bits again, most of which I'm not going to talk about just yet as I've still got a bit of planning to do. And you know how my planning goes... it'll be months before anything actually happens ;)

A while back I managed to get some bits of my old Warhammer Quest set back off the friend who bought all my GW stuff when I had a fit of madness. While all the figures and boards were missing, the doorways came back. I decided to have a go with two of them in preparation for the ideas...


Saturday, 19 April 2014

Walls take 2

After making the first part of a wall last week, I had a rather tragic accident. I tried to create a rubber mold so I could work on the other side of the brickwork.. which didn't go too well.

I'm not entirely sure what went wrong, but the rubber just didn't set properly and the air dry clay got damp in the prolonged exposure to the rubber and started to dissolve. I suspect leaving it overnight in the cold garage to set didn't help.

Still. It gave me pause for thought and I've made a new wall that looks better than the first one. This will be getting a coat of varnish to seal the clay before I attempt to create a mold for this one to avoid the same mistake again.


Design wise the pieces will (hopefully) interlock, meaning that I won't need as much footing as the GW walls. The brickwork should be about the same size as the Garden of Morr, so they shouldn't look out of place except the builder hasn't been using skulls in these walls.

Once I've actually got a decent mold for this, the next job will be to try and get the brickwork to line up neatly on the other side. For some reason the GW walls don't match up in any way, shape or form as you can see from one of my bits below